Overview
In this blueprint, you’ll learn how to create video ads using your smartphone… even if you don’t know how to use fancy video software like Final Cut Pro and Adobe Premiere.
While the principles and techniques can be applied to any kind of advertising, we’re going to focus on creating videos specifically for Facebook Ads.
How Can You Use This?
- You can use what you already have to create videos for your ads.
- You can create your first video using your smartphone.
- You can setup and launch your first video ad on Facebook.
Tools And Resources
There are several tools we’ll be recommending in this blueprint.
Your main equipment for creating videos on your computer will be a good laptop or desktop with at least an Intel i5 processor (with integrated graphics card) and at least 8GB of ram.
If you plan to record and edit videos with your smartphone, I recommend at least an iPhone 6 plus or a Samsung S7 plus. You can use other decent android smartphones such as Google Pixel 2 or Mi 6.
We also recommend having a good internet connection if you are going to upload your videos online.
There are other tools and equipment we’ll recommend along the way but the ones we mentioned are the bare minimum you should have if you’re looking to record and edit videos.
As usual, you can download a PDF version of this blueprint here.
What You Need To Know?
High Reach And Views
Facebook recorded more than 8 billion video views per day in 2015. This means an average of 3-4 videos viewed per active user on the platform.
With an increasing trend of video consumption across different channels, it’s important for small business owners to start advertising on Facebook.
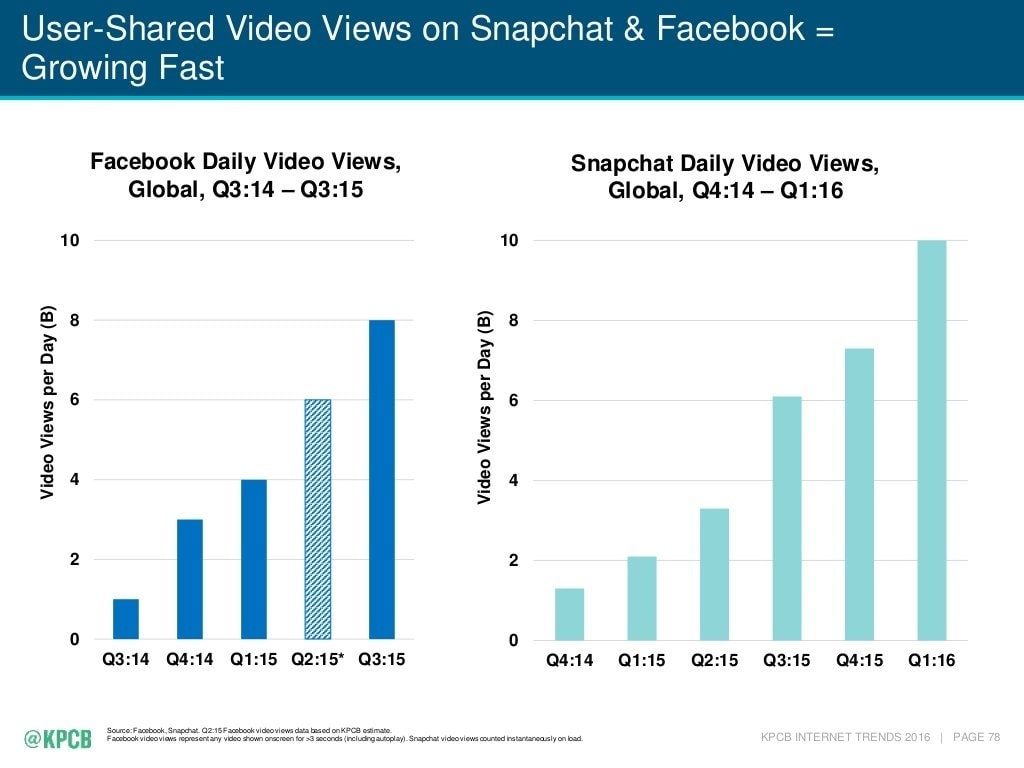
(Credit: Kleiner Perkins Caufield & Byers)
Increasing Video Advertising Spend
About 44% of small business owners plan to put their money in Facebook video content in 2017. It’s highly likely that the number will increase in 2018.
This means that if you’re not investing in creating video content on Facebook, you’re likely to lose out to your competitors.
More Engagement
There are currently 2 dominant players in the online video advertising space – Facebook and Youtube.
As a whole, Facebook videos get about 4 times more interaction than Youtube videos. This means your ads have a higher chance of being viewed and shared amongst your target market.
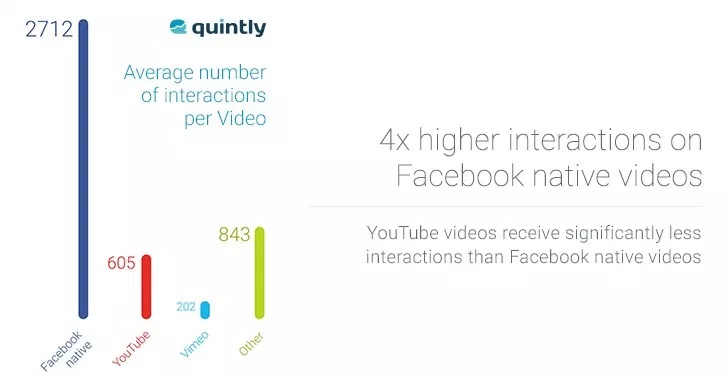
(Credit: Quintly)
Slideshow Ad
This ad type is similar to the single image ad type that we covered in our ‘How To Create Attention Grabbing Ad Images’ blueprint.
The only difference is that you can use multiple images and create a slideshow within Facebook’s Ads Manager itself.
If you want to learn how to create this type of ad, you can check out the ‘Slideshow Ad’ section in that blueprint.
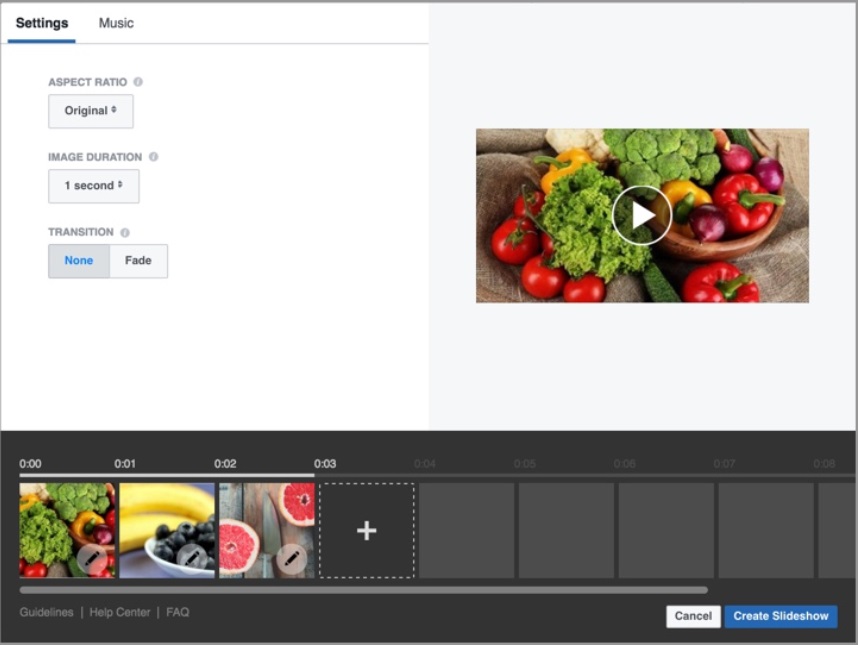
The image specs for this type of ad are:
- 1,280 x 720 pixels for image size
- 16:9, 1:1, or 2:3 for image ratio
We recommend that you use images that are all the same dimensions. Otherwise, your slideshow will be cropped to be square.
Video Ad
This ad type is similar to a normal image ad. You’ll still be able to use all the targeting options on Facebook.
The only difference is that instead of using image, you’ll use a video clip as the creative, as you can see below:

(Credit: Facebook)
This ad type allows for increased engagement. It’s possible to get extremely cheap video views too.
The recommended specs for this type of ad are:
- MOV or MP4 files for video format
- 16:9 for image ratio
- At least 720p for resolution
- 2.3 GB max for file size
- 240 minutes max for video length
Video Link Ads
This type of ad is similar to the video ad type above.
The difference is that it will lead viewers who click on the ad creative to your website or other pages that you want them to see.
That’s why this ad type is extremely effective for getting conversions.
The recommended specs for this type of ad are the same as those for the video ad above.

(Credit: Facebook)
There are basically 4 steps to launching off your video advertising campaign on Facebook. .
You’ll need to produce the videos. This can be done with existing images or videos or you can shoot your own videos. We’ll show you how to do both in this blueprint.
Once you have produced your video, the next step is to edit it. You can use a wide variety of free and paid software to do your editing. The tool we’ll be using is FilmoraGo, which has a great app on both iOS and Android phones.
Once you’re done with the editing, you want to upload and post the video on Facebook. We’ll walk you through the steps on how you can do it on your mobile phone.
Last but not least, we’ll share how you can create and launch off your video ad on Facebook.

It’s important to have a clear idea what is the objective of your video ad. Otherwise, you might be spending precious time and resources creating videos without getting any measurable results for your business.
Some objectives could include:
- Growing your email list
- Attracting more sales
- Getting more reach
- Building brand awareness
- Get more likes on your Facebook page
Depending on your objective, you will determine the topic of your video and the format in which it delivered.
Guidelines
We recommend that you keep your videos as short possible.
On average, we try to keep the videos for our campaigns around 1-5 minutes long.
This ensures that you have a higher chance of getting your message across to viewers.
It’s important that you can grab the attention of viewers within the first 5 seconds of them watching your video.
This is because research by Facebook has shown that viewers spend, on average, 1.7 seconds with a piece of content on mobile.
So if you aren’t able to get them hooked within the first few seconds, you’d have missed the opportunity for them to consume your content.
The more dynamic your video, the more engaging it will be.
This increases the chance that viewers will continue to interact with your content and take the action that you want them to take.
If your video is memorable and entertaining, it increases the likelihood of viewers sharing your video.
This increases your organic reach and the chances of you getting organic leads.
Studies have shown that viewers tend to click more on videos that are shared by their friends as they trust what their friends have shared.
Just like an image ad, you should include a clear call to action (CTA) in your videos.
You should also ensure that you choose the right CTA button for your Facebook ad.
These will help you to deliver your message to the viewers clearly, so they’ll take the specific action that you want them to.
Production
You should select a place with good natural lighting or fluorescent lighting.
It’s also important to ensure that there is enough lighting on the primary subject’s face and the background.
In the example below, you can compare the image of poor lighting (on the left) vs the image of good lighting (on the right).

In general, the quality of the audio recording on many smartphones are enough for filming purposes.
As much as possible, you should try to shoot your videos indoors instead of outdoors to avoid wind noise.
You should also take note of places with high ceilings as this may result in an echo, which affects the audibility of your video.
If you have to shoot outdoors, you can also invest in a dead cat windscreen for your phone, as shown below.
It is designed for minimising any wind noise when recording in high wind conditions.
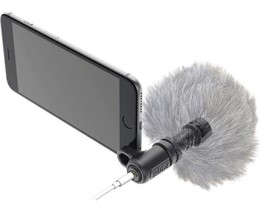
(Credit: Photojojo)
It’s crucial to ensure that your equipment is stable when you are filming as too much vibration in the video can be irritating for the audience.
This will negatively affect the watchability and engagement of your video.
You can prevent this by getting a cheap portable tripod with a smartphone holder or clamp.
Alternatively, you can also invest in a gimbal (3-axis).
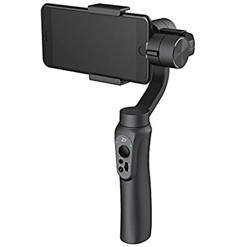
(Credit: Zhiyun Tech)
Editing
Now that you’ve filmed your first video on your smartphone, it’s time to edit it before you use it in your ad.
In this blueprint, we’ll focus on how you can edit your video on your smartphone itself using a mobile app called FilmoraGo.
FilmoraGo is a video editor mobile application, which will not stamp a watermark or place a time limit on your video clip.
The best thing about it is that it’s free!
Go to your phone’s app store and search for ‘FilmoraGo’.
Click ‘Install’ and open the app.
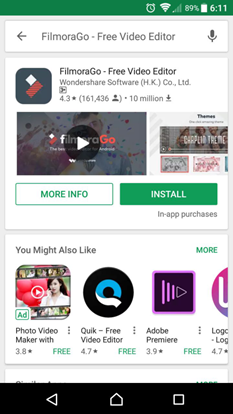
Open the FilmoraGo app on your phone.
Click ‘CREATE NEW VIDEO’.
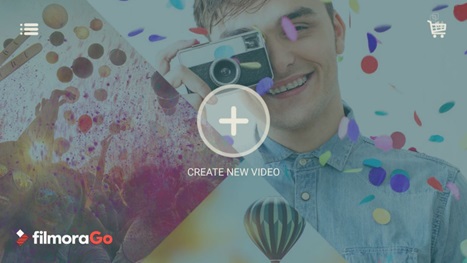
Select the video(s) that you want to use.
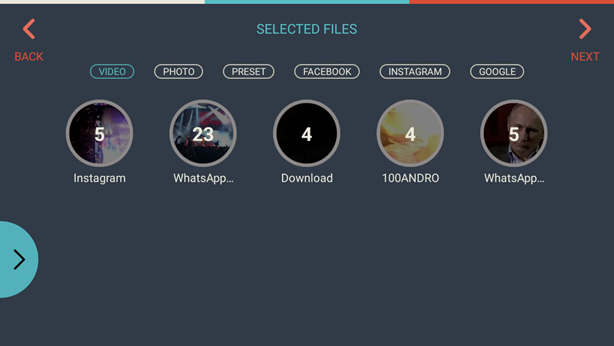
After choosing the videos, click on ‘Add’.
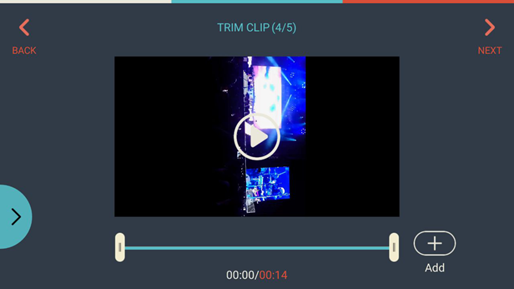
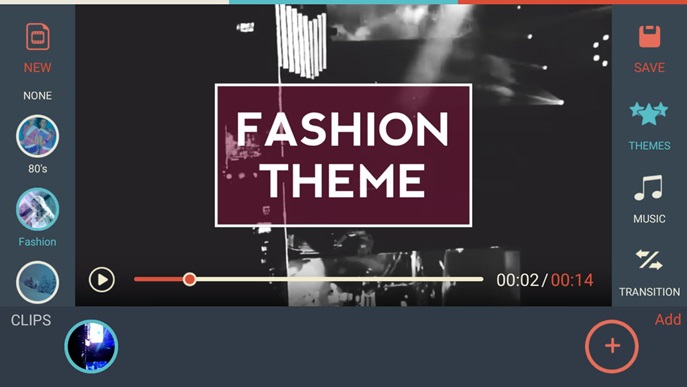
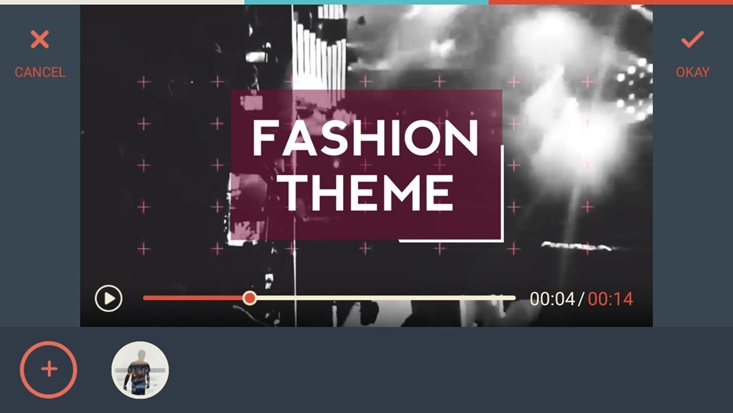
Sometimes, you may want to add themes and filters to your video so that it looks more interesting or makes the viewer feel a certain emotion.
For example, if current clip is a flashback scene, using the ‘80’s’ filter can create a nostalgic vibe and is also a visual cue to the viewer.
You can try it out by clicking ‘Themes’ on the right side of the phone screen.
You can choose the filter and special effect that you want on the left side of the screen.
Sometimes in the production process, even though you try your best to improve your lighting, you may still need to make some adjustments to your video.
Using the app, you can edit elements like the brightness, contrast, saturation and so on.
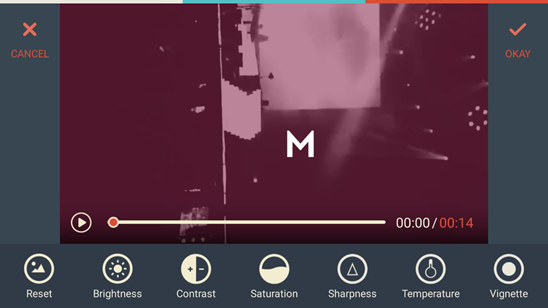
To make such edits, click on ‘Adjust’.
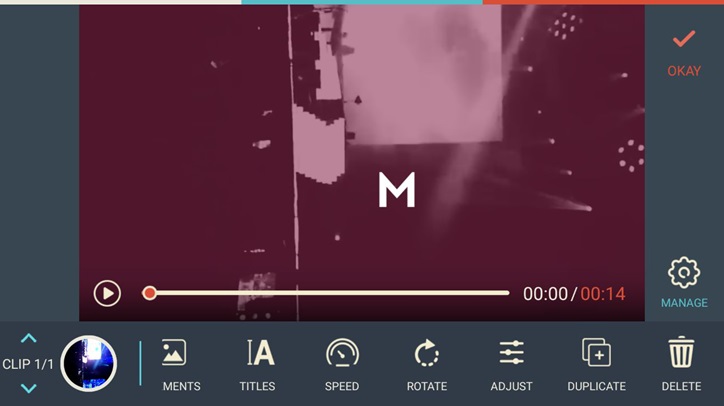
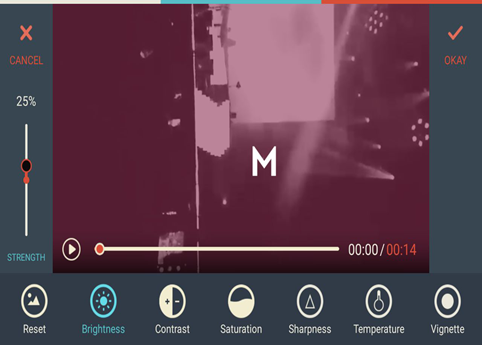
Click on any of the elements at the bottom of the screen to edit your video.
Once you select the element, you can choose the level of strength that you want to change it to.
Then click ‘Okay’ to save your changes.
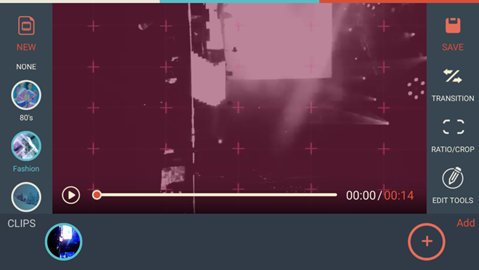
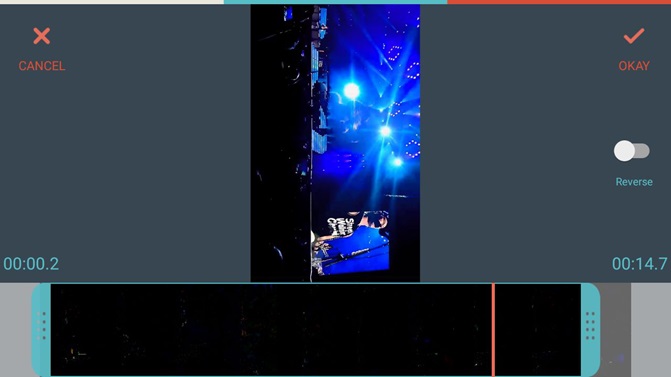
In some cases, you may only want to use certain parts of a video, so you’ll have to trim it to end up with a clip with the relevant parts.
To do this, click ‘Edit Tools’ on the bottom right of the screen.
Click ‘Trim Clips’ at the bottom left of the screen.
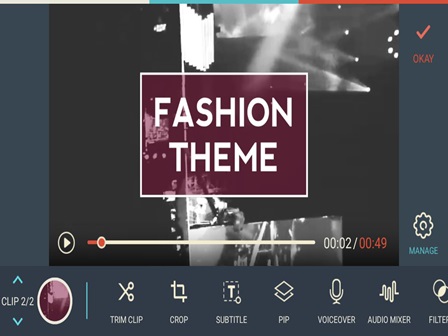
By moving the blue edges front and back, you can select the relevant parts of the clip that you want.
Once you are done selecting, click ‘Okay’ and the video will be trimmed.
Just like filters and themes, adding music to your video can also make your video more interesting and engaging.
Music can also be used as emotional intensifiers.
In fact, an abrupt absence of music can also create a stark contrast and can be impactful on the viewer when used properly.
Click ‘Music’ on the right side of the phone screen.
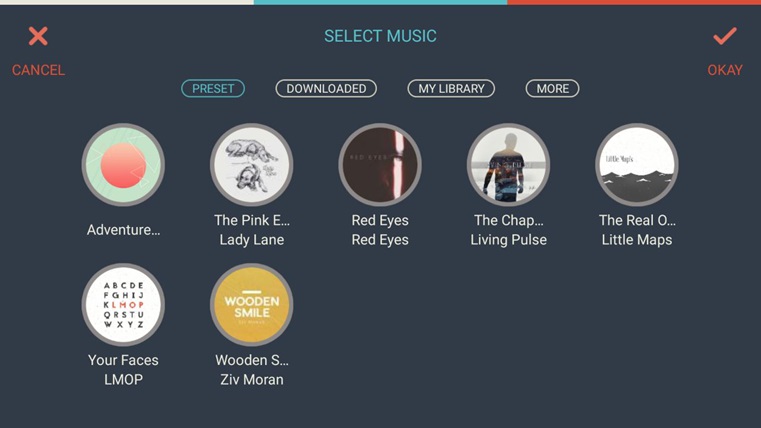
Click on the ‘+’ sign at the bottom left of the screen to select songs that you want to add to your video.
You can select songs that are stored in your phone or use the free music provided in the app itself.
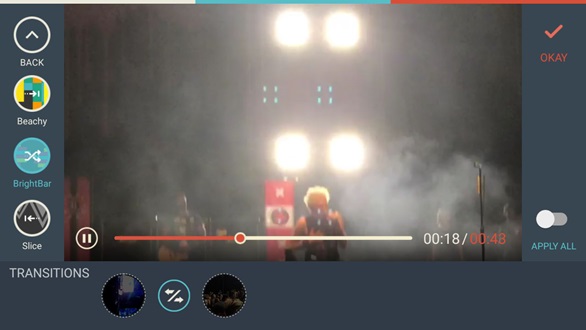
Adding transitions is a useful visual cue to signal to the viewer that there is a progression in the video content.
For example, if there are several parts to your video, using a transition between each part will help the viewer follow your content more clearly.
To do this, click ‘Transition’ at the timing in the clip where you want to add this effect.
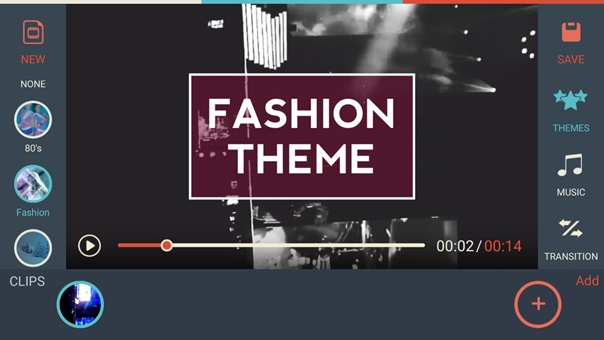
Select the type of transition that you want on the left side of the screen then click ‘Okay’.
Captioning your videos can impact how successful they’ll perform as Facebook ads.
A report by Digiday revealed that on average, 85% of their Facebook videos are watched on mute.
This is because by default, videos autoplay in your Facebook news feed and are muted.
Facebook says internal tests showed that captions can increase video view time by an average of 12%.
Thus, it’s crucial for you to add subtitles and clear Call To Action phrases in your videos.
To add text to your videos, click ‘Subtitle’.
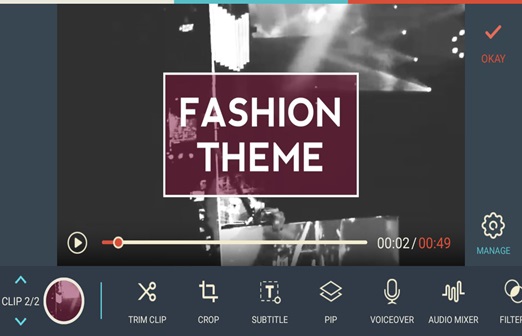
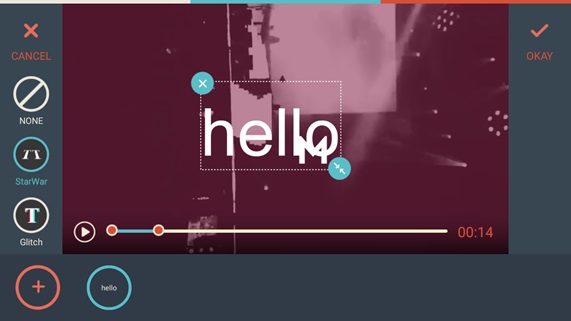
Click ‘+’ sign and a text box will appear.
Edit the text in the box and select the effects that you want on the left side of the screen.
Then click ‘Okay’.
Now that you’ve done making all the edits that you want to your video, remember to save it!
Select ‘Save’.
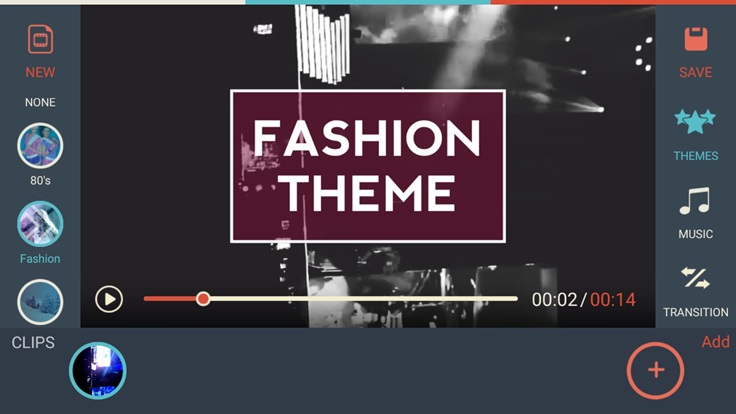
Choose where you want to save your video to.
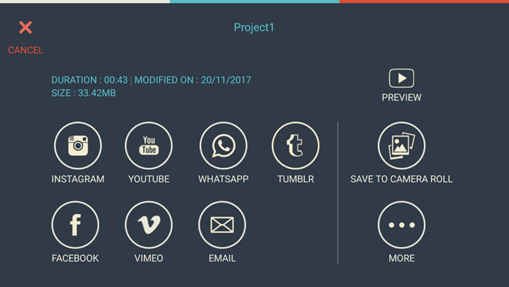
Congratulations! You’ve just created and edited your first video and this was done on just your smartphone!
We won’t be covering how you can edit your video on a computer.
Nevertheless, we recommend that you check out Filmora Wondershare for Windows and iMovie if you’re a Mac user.
What To Write In Your Facebook Post?
It’s important to have a callout that targets a specific niche and piques their curiosity.
One of the ways to do this is to create a knowledge gap either by introducing a new perspective or mythbuster.
You can learn more about writing converting ad copy in our ‘How To Create Facebook Ads That Sell’ blueprint.
The headline is the second important part of the ad.
Your headline should stop your market on its tracks and literally force them to continue reading your post or click to the next page.
The description usually gets the least attention by most readers.
In fact, on the mobile platform, most of the description is hidden by the call to action button.
However, if you do write the description, keep it as straightforward as possible and direct as possible.
You can learn more about optimizing your ad’s headline and description in our ‘How To Create Facebook Ads That Sell’ blueprint.
Instead of writing a long ad copy, try to clearly explain to users why they should click. Use stories and elements of curiosity to get them to click.
Offering additional incentives such as discounts and freebies usually helps. However, be careful not to attract too many cheap clicks that don’t convert into leads and sales.
You can learn more about writing converting ad copy in our ‘How To Create Facebook Ads That Sell’ blueprint.
As mentioned above, it has been reported that about 85% of videos on Facebook are being watched without the sound on.
If you want to increase engagement, you can prompt viewers to turn on the sound in your ad copy.
For example, your ad copy can start like this “[Turn Sound On]”.
Depending on the objective of your ad, you should state explicitly the action that you want viewers to take after seeing your ad.
For example, if you are running a video link ad, you might say. “Click here to learn more: (your website’s URL)”.
How To Post Your Video On Facebook
So now that you’ve created a video and you know what to write in your Facebook post, it’s time to learn how you can post your video on Facebook.
We’ll be demonstrating the ‘Quick Creation’ feature in this blueprint.
Go to https://business.facebook.com and log in.
Click on your ad account.
(If you haven’t set up your Facebook Business Manager account and Ad Account, then you can learn more in our ‘How To Use Facebook Business Manager To Improve Your Ad Performance’ blueprint.)
On the campaign level, click the green ‘+Create’ button.
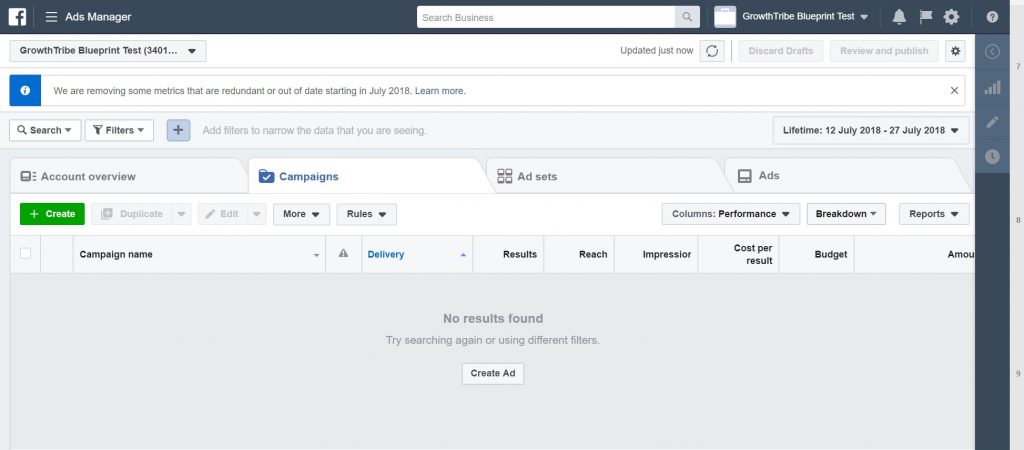
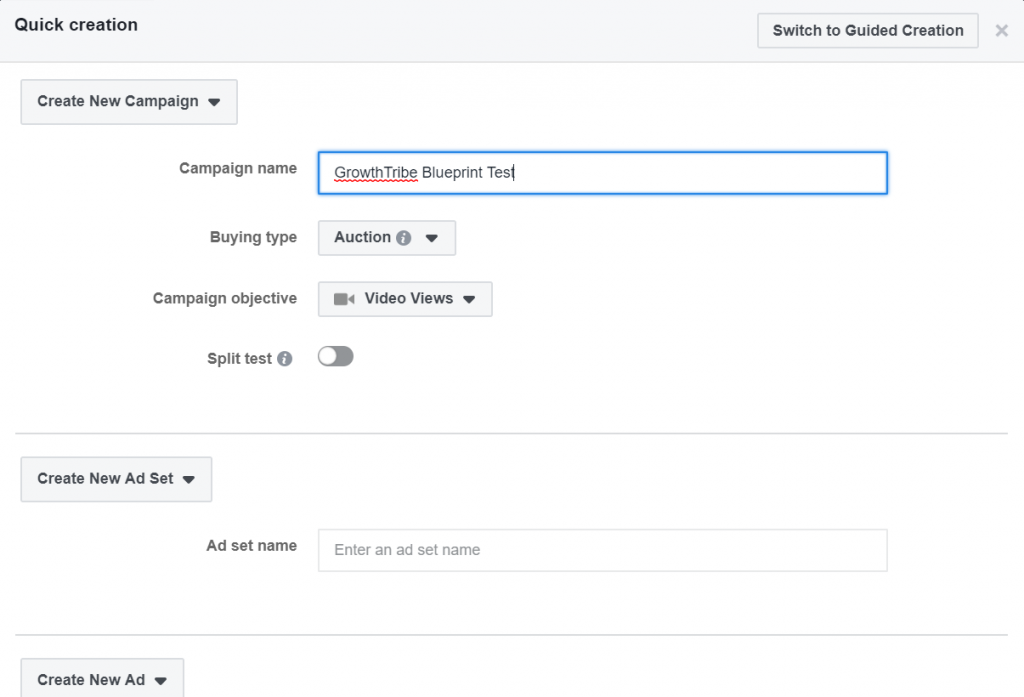
Name your campaign, select buying type as ‘Auction’ and choose ‘Video Views’ as the campaign objective.
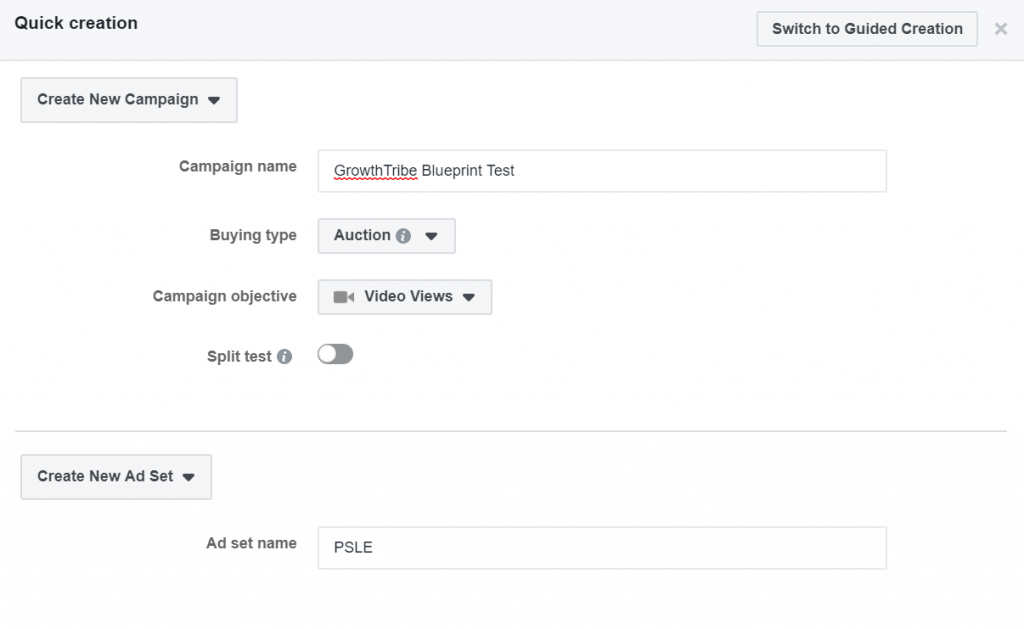
You can name your ad set according to the type of interest you are targeting.
In our example, we’re assuming that we’re targeting parents with children who are taking the Primary School Leaving Examination (PSLE) a compulsory national exam in Singapore.
So we’re naming the ad set as ‘PSLE’.
Click ‘Save draft’.
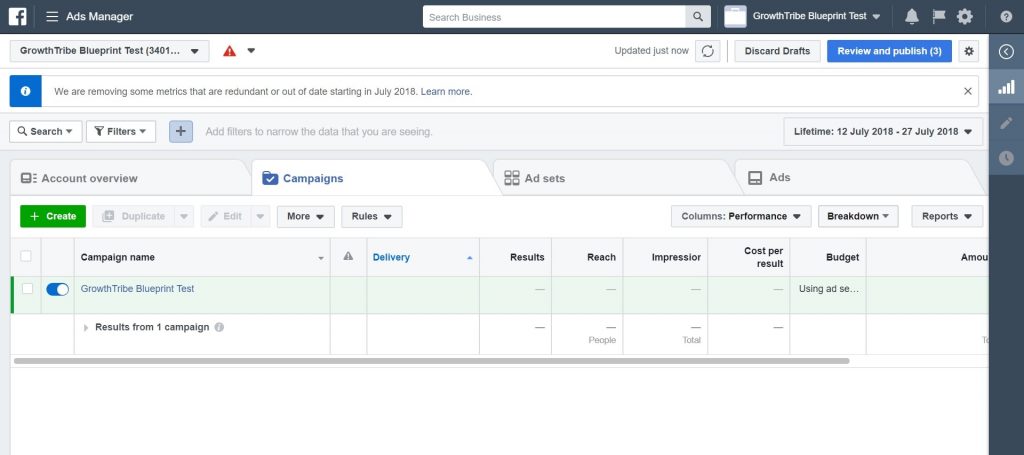
Click on the ‘Ad sets’ tab in the middle.
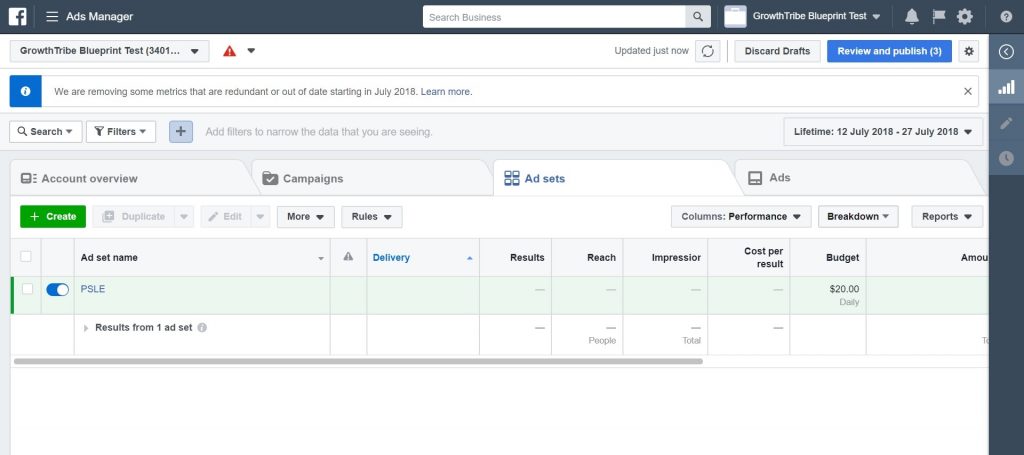
Select the ad set and click ‘Edit’.
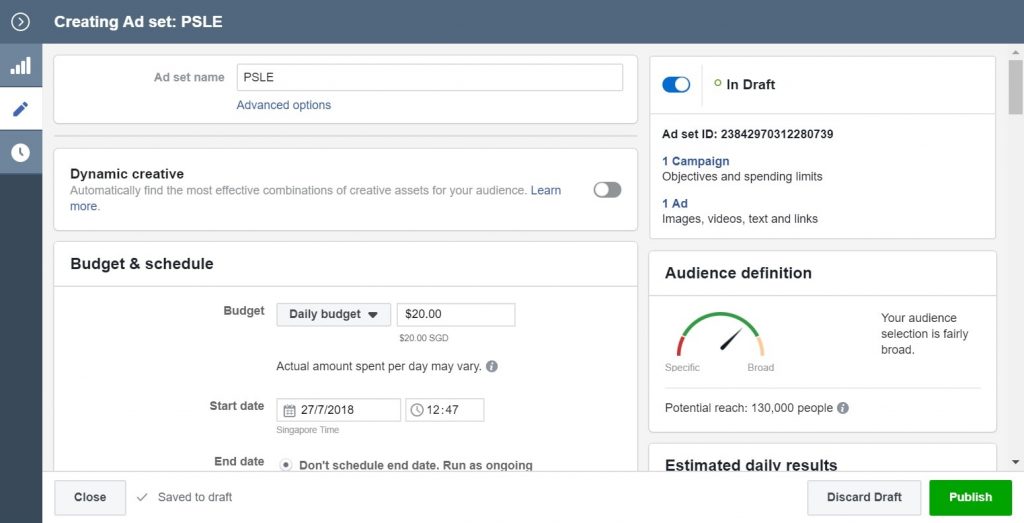
Edit the daily budget that you are comfortable with.
Edit the audience details according to your ideal customer avatar.
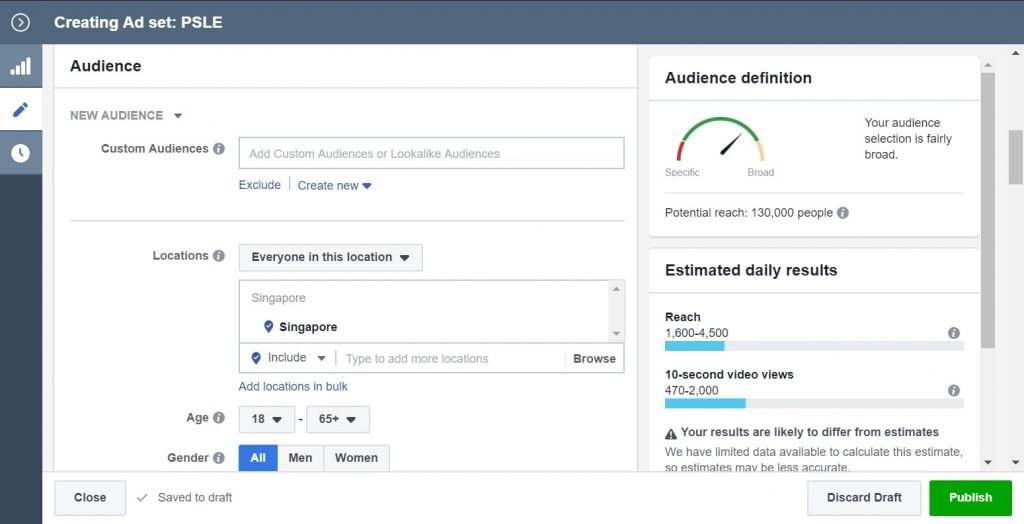
Select the detailed targeting interest based on your ideal customer avatar’s interests.
In our case, we chose the Primary School Leaving Examination interest.
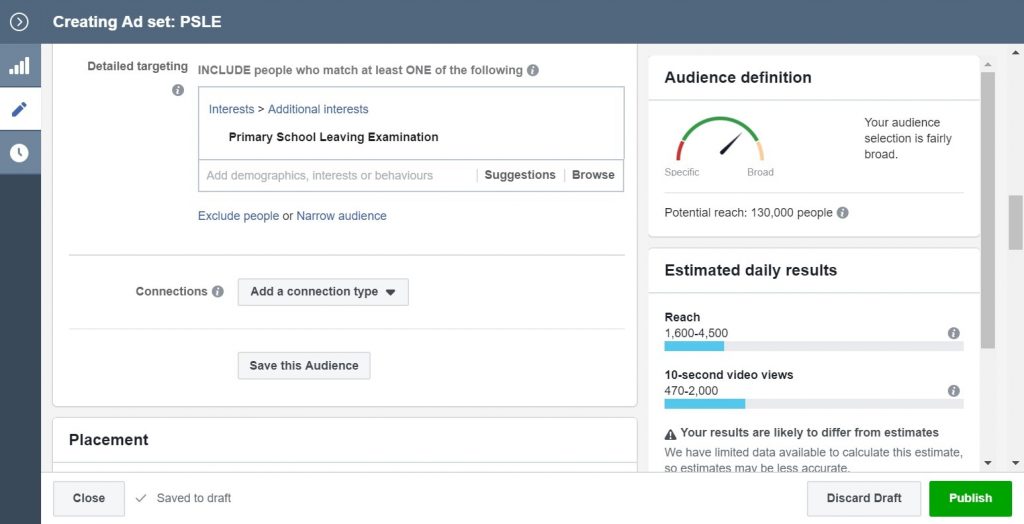
You can edit the placement for your ads.
In our example, we’ll select ‘Edit placements’ and select ‘Mobile’ for device types.
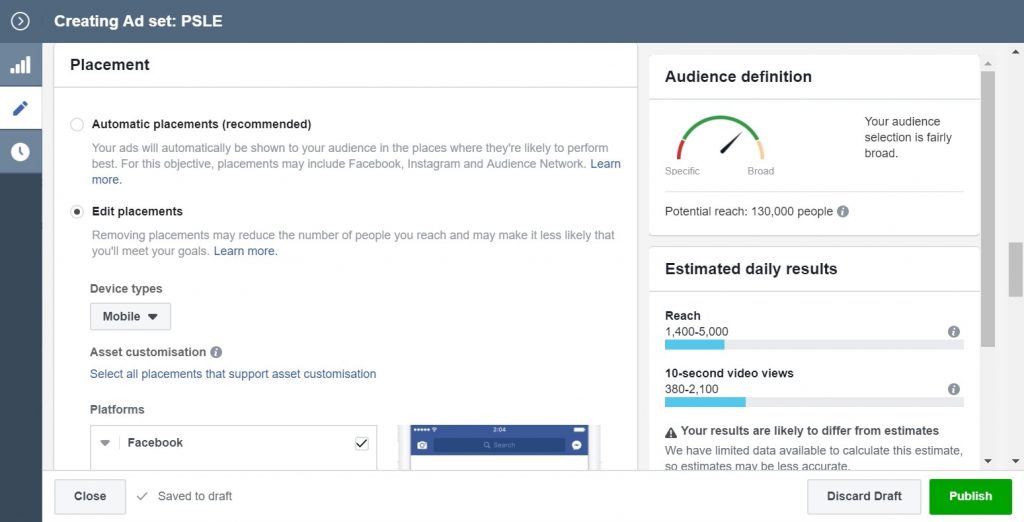
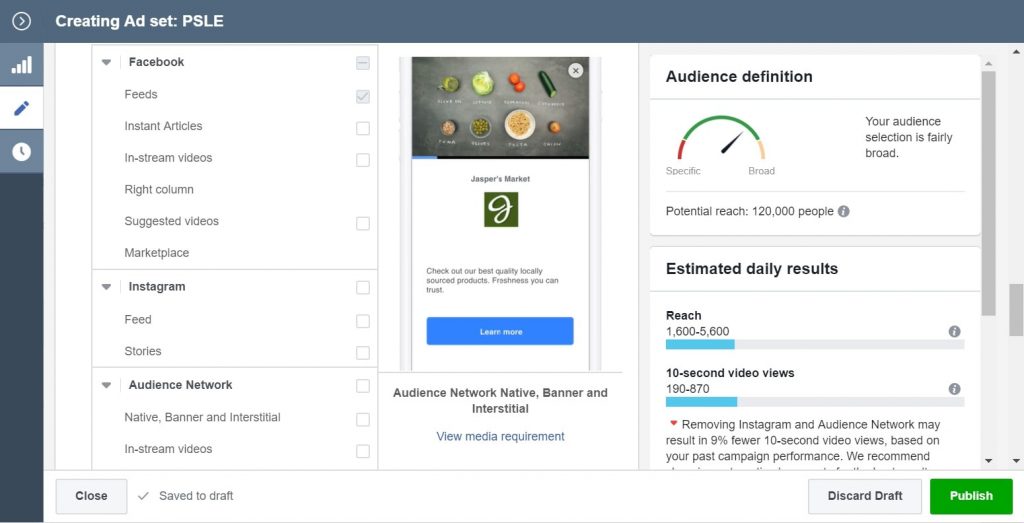
Select Facebook and ‘Feeds’ then uncheck all the other boxes. For this demonstration, we’ll just focus on one placement, which is the Facebook news feed.
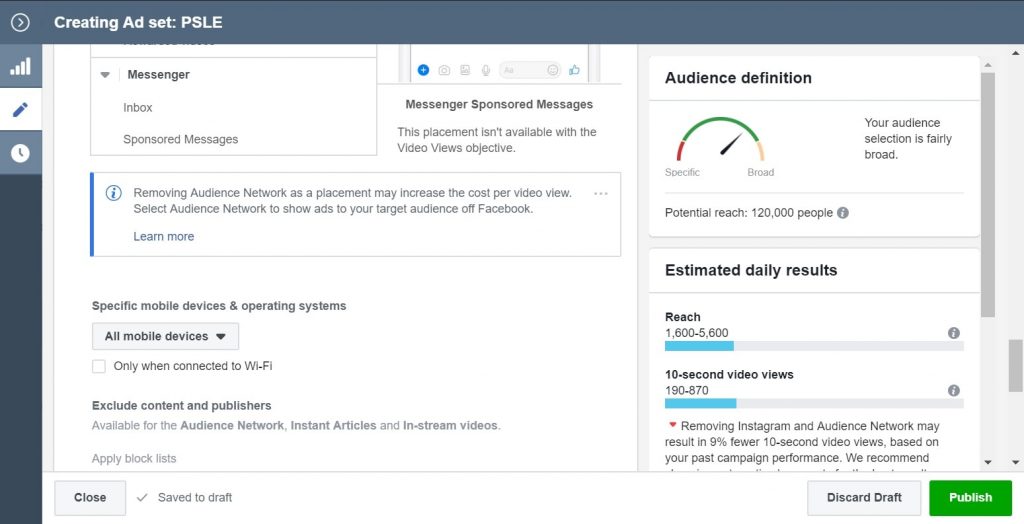
Select ‘All mobile devices’ for specific mobile devices & operating systems.
Select ‘10-second video views’ for optimisation and ‘Impression’ for when you are charged.
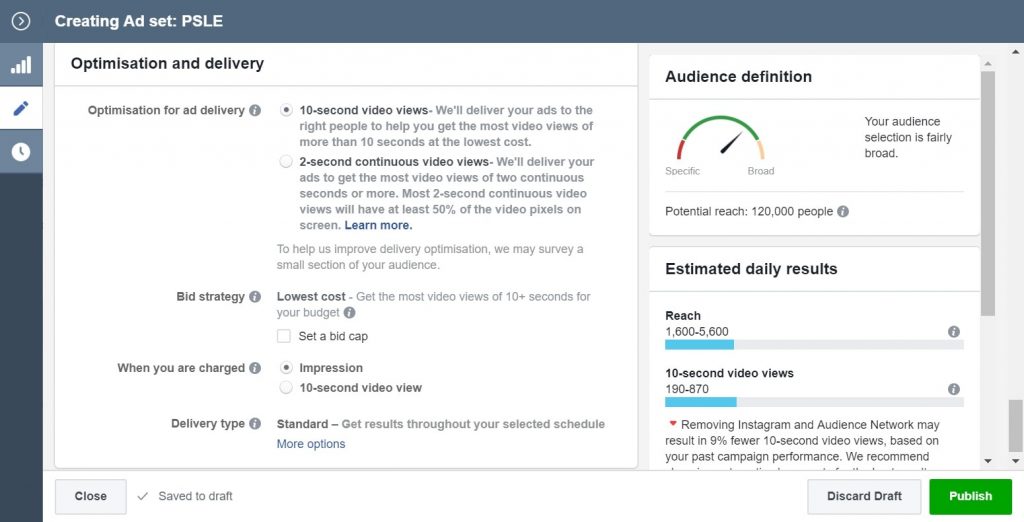
Click ‘Close’ at the bottom left and Facebook will automatically save your changes as a draft.
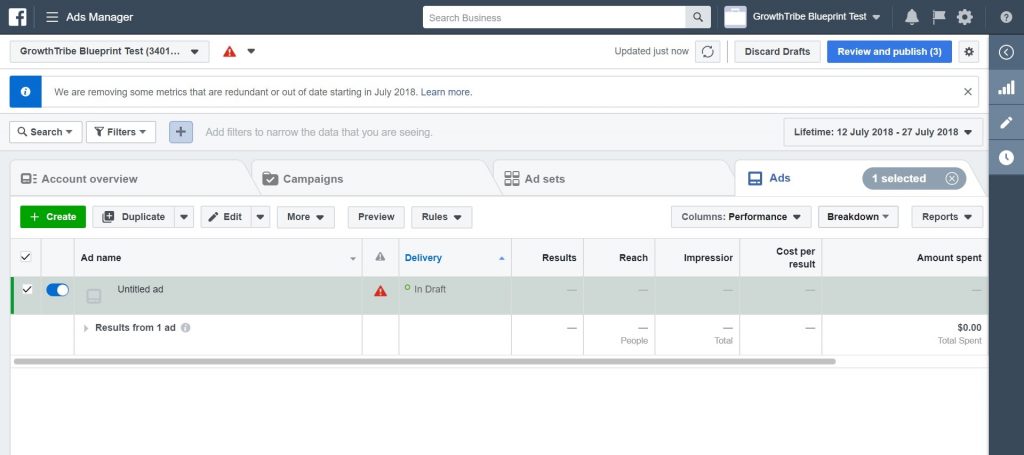
Click on the ‘Ads’ tab on the right.

Select the untitled ad and click edit.
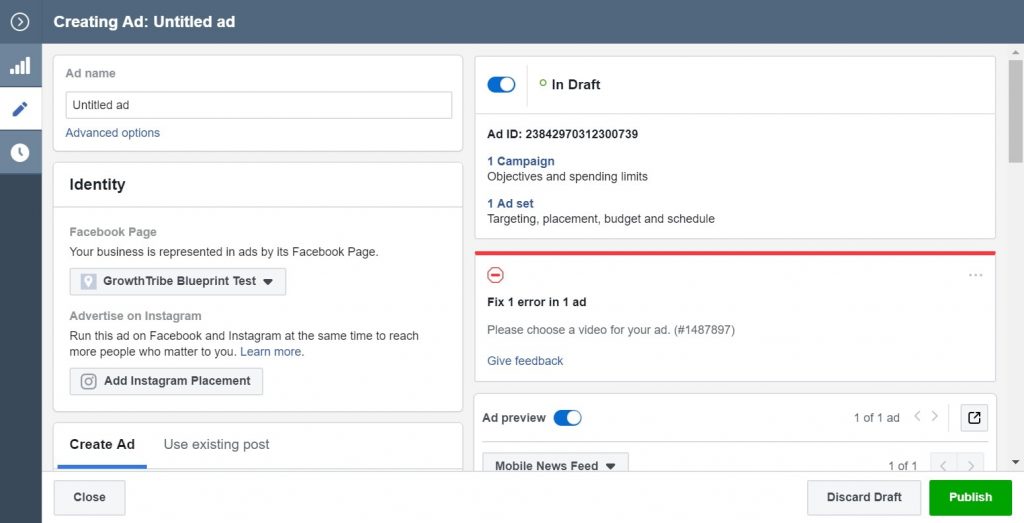
Name your ad and select your Facebook page.
If your business has an Instagram account, you can add an Instagram placement too. But we won’t be covering that in this blueprint.
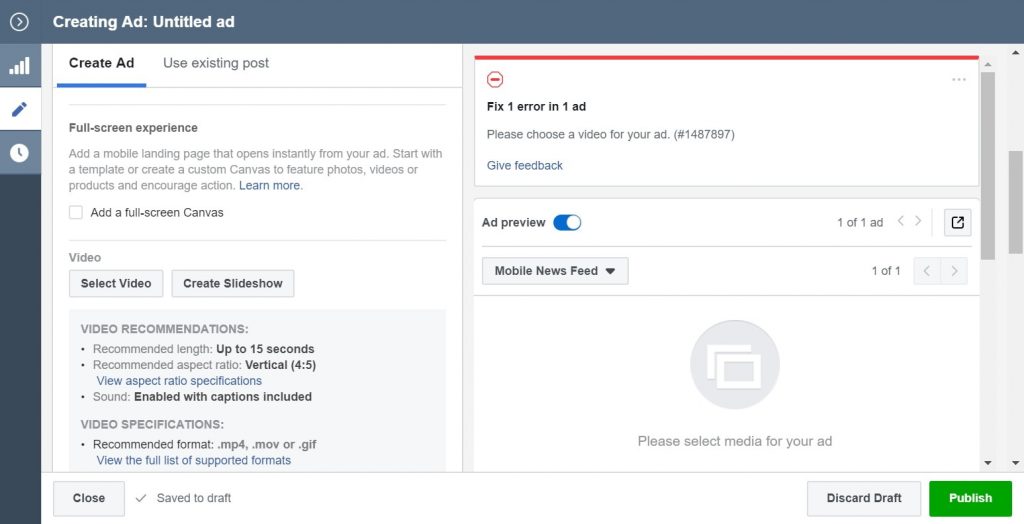
Click ‘Select Video’.
Click ‘Upload videos’.
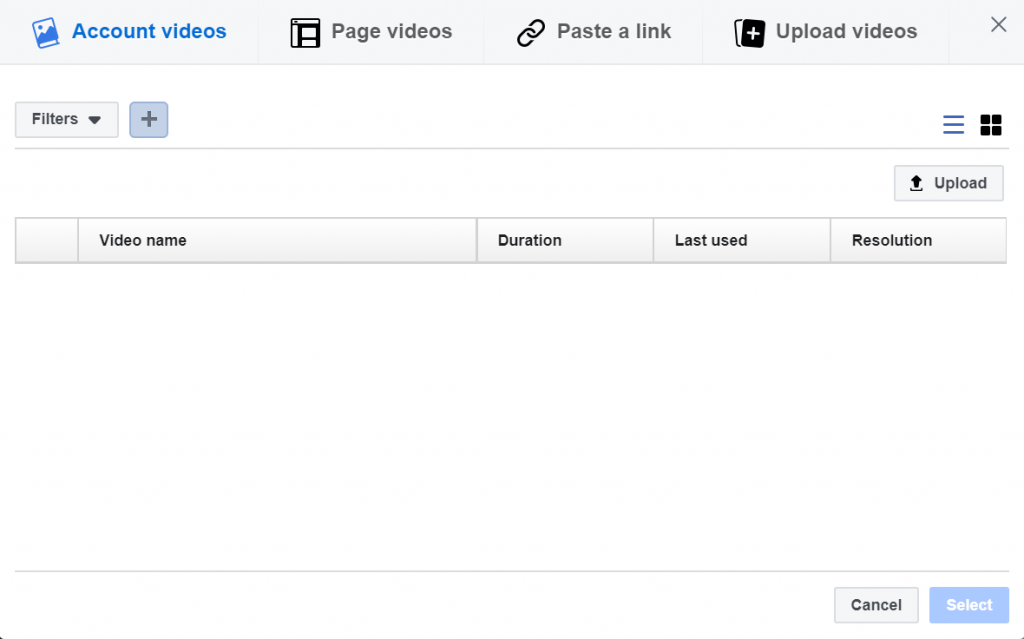
You can drag and drop the video from your computer or you can click the shaded area to upload your video.
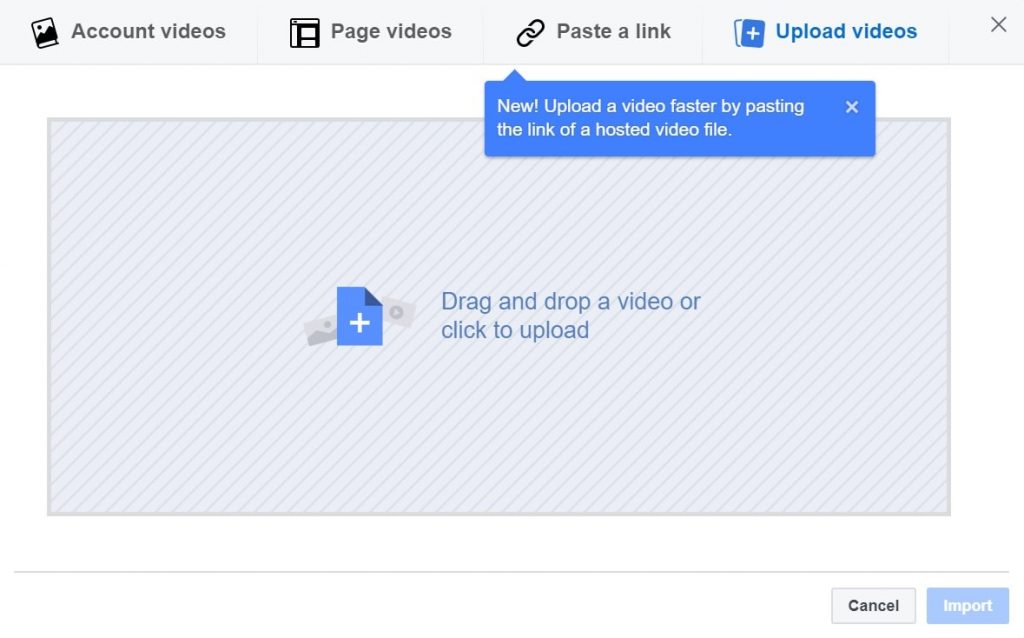
You’ll see your video uploading.
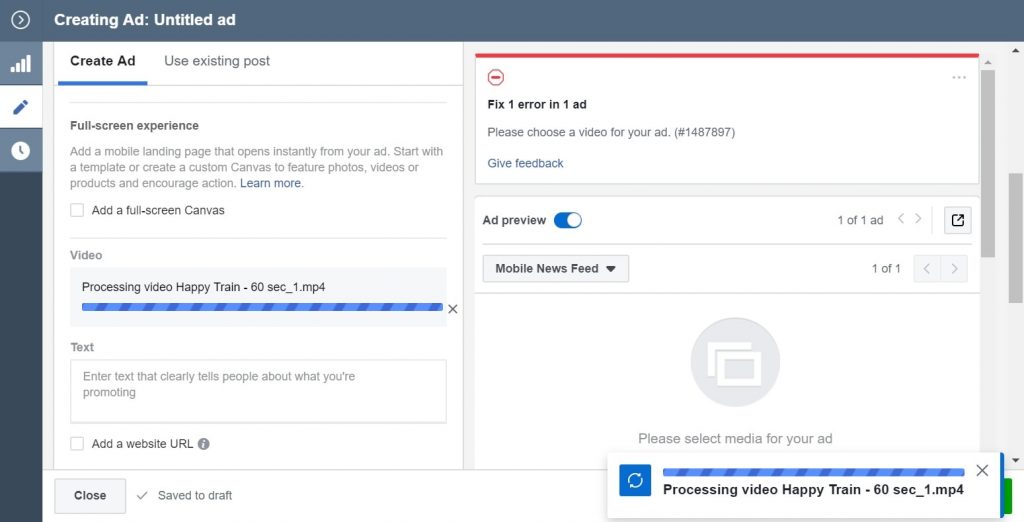
You’ll see a preview of your video on the left once it’s uploaded.
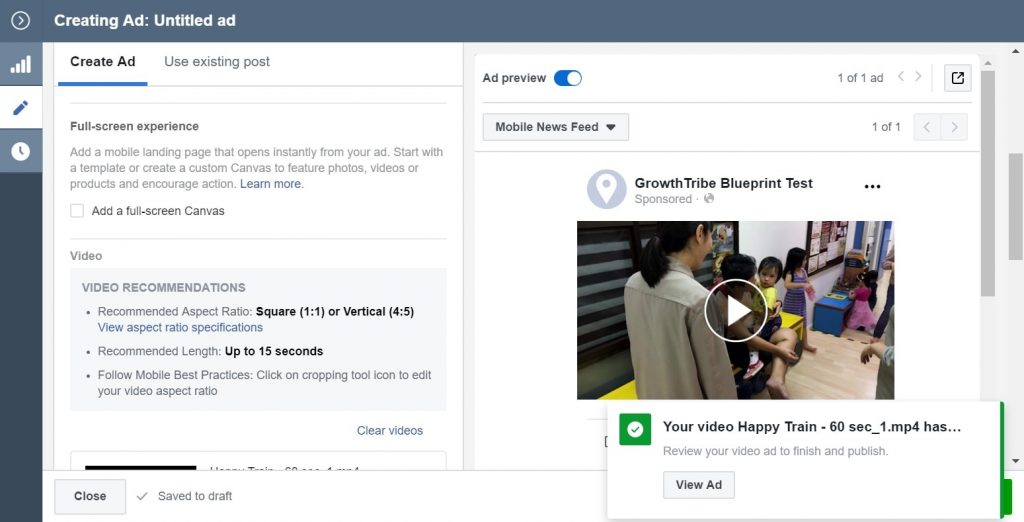
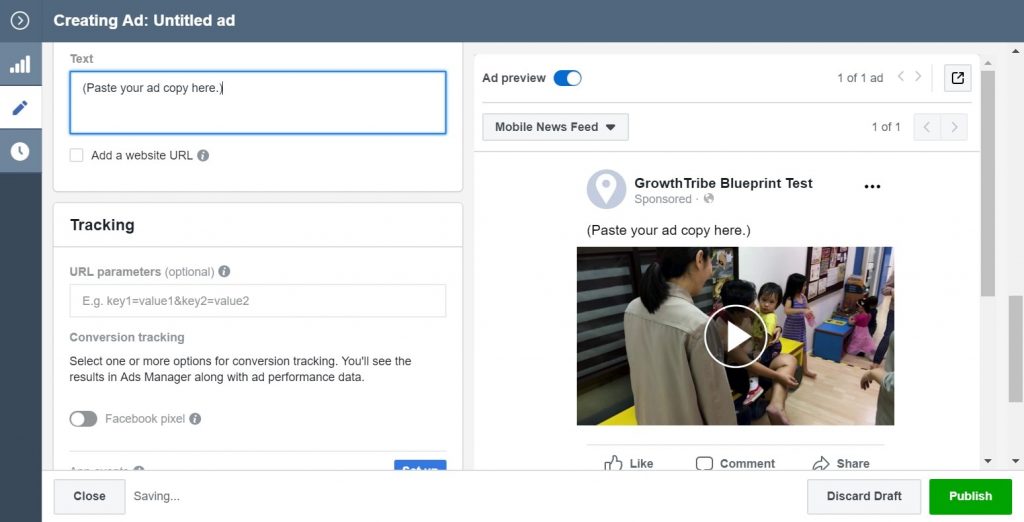
Then you can paste your ad copy to the box below the ‘Text’ header.
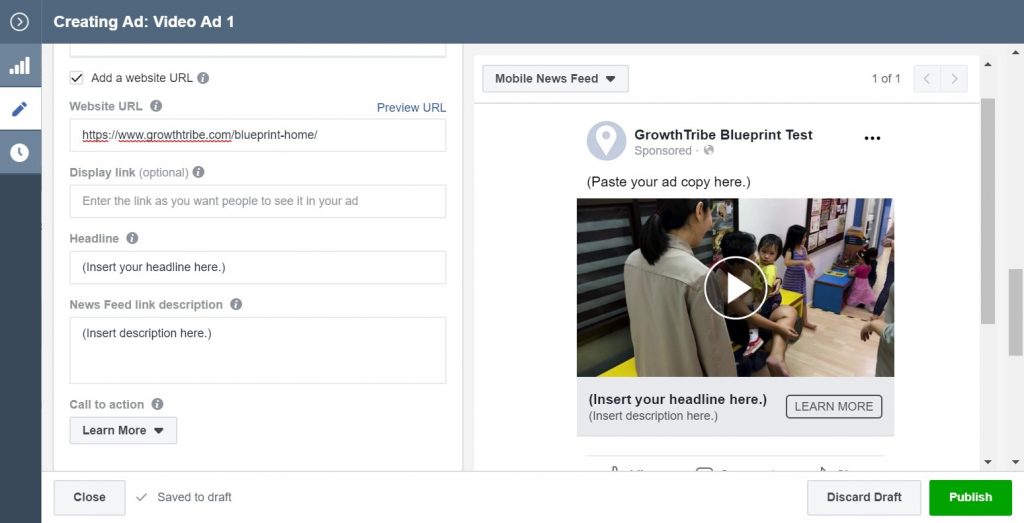
Tick ‘Add a website URL’ and fill up your headline and description.
Choose a ‘Call to action’. In our case, we selected ‘Learn More’.
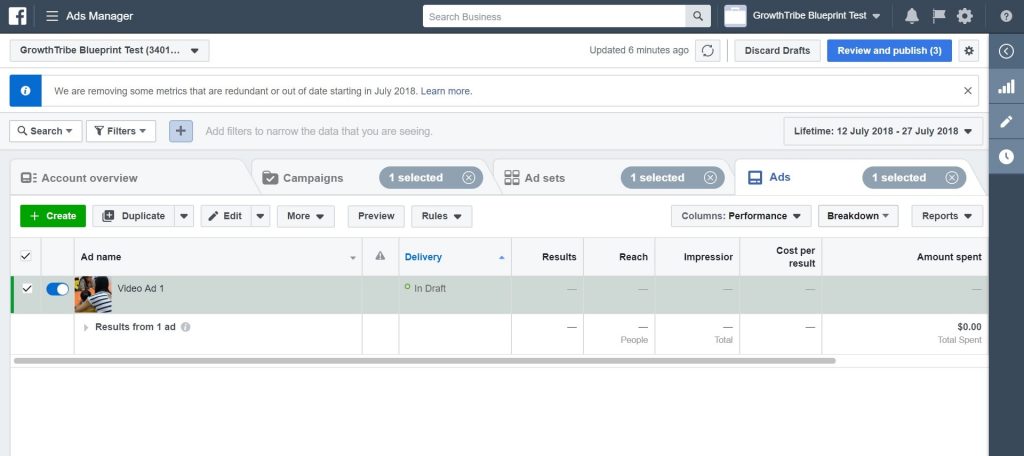
Click ‘Close’ at the bottom left and Facebook will automatically save your changes as a draft.
Check that you’ve set up everything correctly on the campaign, ad set and ad level. Then click ‘Review and publish’.
Click ‘Publish’.
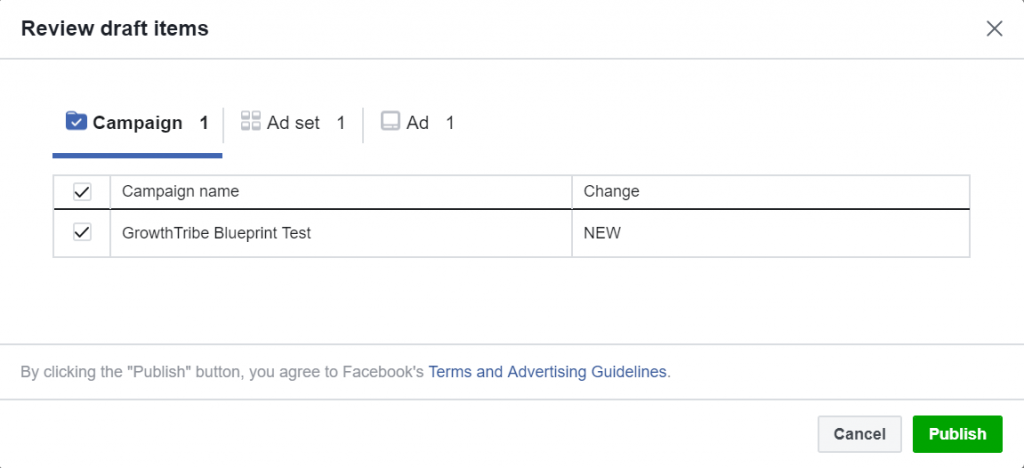
And your campaign will be reviewed by Facebook. Once it is approved you will see that the campaign is ‘Active’.
How To Know If Your Video Is Working?
The ‘Video Views’ objective is designed to show your video ad to people most likely to watch your video.
Some of the metrics that you can track to measure the performance of your ad are 3-second video views, cost per 3-second video view, 10-second video views and video watches at 100%.
You can view these metrics in the ads manager.
Click on the ‘Columns’ button at the campaign level and select ‘Video Engagement’.
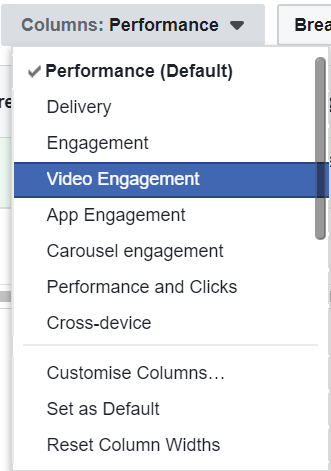
You’ll see the metrics as the column headers.

The ‘3-second views’ metric measures the number of times your video was watched for an aggregate of at least 3 seconds, or for 97% of its total length, whichever happened first.
On the other hand the ‘cost per 3-second video view metric’ measures the cost of each 3-second view.
It is calculated by dividing the total amount spent by the number of 3-second views.
A large number of 3-second video views could be a good indicator of that your target audience is interested in your video content.
These 2 metrics work the same as their 3-second counterparts above.
This will be a better indicator of engagement as it shows the number of people who were engaged by your video for a longer period of time.
You could look at video watches at 50%, which is the number of times your video was watched at 50% of its length, including watches that skipped to this point.
The higher the number for this metric, the better the performance of your ad.
What’s Next?
Now that you’ve created your first video, you have a system that will help you generate new video ads.
If you want to learn about to set up and launch a Facebook campaign, you can check out our blueprint ‘How To Launch Your First Facebook Lead Generation Campaign’.


